| Data Destroyer |
|---|
| Purging selected folders |
This page describes an alternative approach to purging files, mentioned previously as Method 2, and is quite separate from the Method 1 explained earlier.
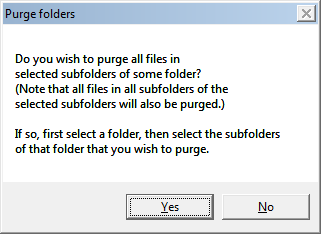
Clicking on the 'Purge folders' button brings up: 
Clicking on 'Yes' brings up the folder selection window by which you can specify a folder, after which the subfolder-selection window appears, for example:
 After checking the folders to be purged, click on 'Accept'.
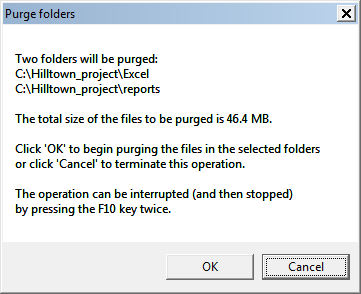
 After you confirm the purge operation, the program proceeds to purge all files in the selected folders and all files in all subfolders of those folders (the slack area is also purged), and empty subfolders are deleted. This method of purging files (unlike Method 1) does not check for sensitive file extensions, and if a date restriction has been specified then it does not apply in this operation. This operation does not write to a report window, so it proceeds much more quickly than Method 1. Thus you should double-check the subfolders to be purged before giving the go-ahead for this operation.
 As the program informs you, you can interrupt the operation by pressing the F10 key twice, but you may have to wait until the purge of the current file is completed. If that file is large and the type of purge requires numerous overwrites then there may be a some delay before the 'Cancel?' query appears.


